
A Beginner’s Guide to Switching Your Coinbase Primary Wallet to Web3 Wallet
The buzz around Web3 is undeniable. From NFTs to decentralized finance (DeFi), Web3 is shaping the future of how we interact with the digital world. A vital tool in this ecosystem? The Web3 wallet. If you’re new to this space, you’re likely wondering how to safely manage your crypto assets and make the most of decentralized platforms. This guide breaks it down for beginners looking to transition from a Coinbase primary wallet to a Web3 wallet.
By the end of this post, you’ll understand what a Web3 wallet is, how Coinbase’s Web3 wallet works, how to set it up, and why it’s worth making the switch. Plus, we’ll cover essential security tips and answer common questions to ensure you start your Web3 journey with confidence.
What is a Web3 Wallet and Why Do You Need One?
A Web3 wallet is your gateway to decentralized applications (dApps) and other services on the Web3 ecosystem. Unlike traditional wallets, a Web3 wallet gives you complete control over your private keys, making you the sole owner of your assets—no intermediaries involved.
Why Web3 Wallets Matter
- Access to DeFi: Web3 wallets enable you to interact with decentralized finance protocols, letting you lend, borrow, and earn crypto securely.
- NFT Management: They simplify owning, transferring, and showcasing NFTs.
- Enhanced Control: With Web3 wallets, you hold your private keys—ensuring no third party can control or freeze your account.
While Coinbase’s primary wallet is streamlined for trading, a Web3 wallet is essential for absolute ownership and access to the broader decentralized web.
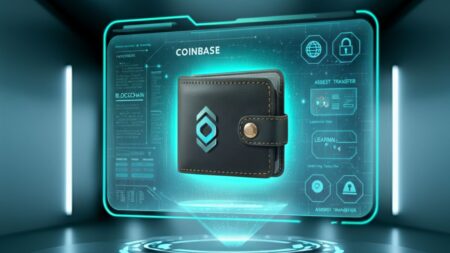
Understanding Coinbase’s Web3 Wallet
Coinbase isn’t just for trading crypto anymore. Its Web3 wallet is purpose-built for exploring the decentralized internet, allowing you to interact with dApps, hold NFTs, and transfer funds securely.
Key Features of Coinbase Web3 Wallet:
- Standalone App: It functions independently of your primary Coinbase wallet.
- Decentralized: You own the private keys, putting you in complete control of your funds.
- Multiple Blockchain Support: Seamlessly interact with Ethereum, Polygon, and other blockchain networks.
- NFT Storage: Store and transfer NFTs directly from your wallet.
- Built-in Browser for dApps: Access DeFi apps, NFT marketplaces, and games without leaving the app.
The Coinbase Web3 wallet is beginner-friendly, making it a great starting point for users interested in decentralized applications.
How to Set Up and Use Coinbase Web3 Wallet
Here’s a step-by-step guide to get you started:
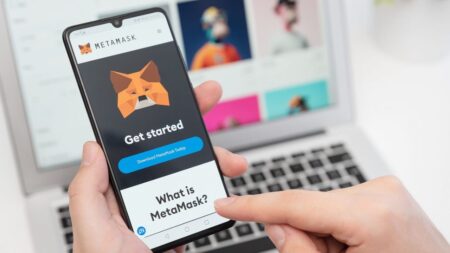
1. Download the Coinbase Wallet App
Search for “Coinbase Wallet” on Google Play or the App Store. Make sure to download the Wallet app, not the primary Coinbase app.
2. Create Your Wallet
- Open the app and select Create a New Wallet.
- Set a strong password and write down your recovery phrase. Pro Tip: Keep your recovery phrase offline and in a secure location—you’ll need it to access your wallet if you forget your login.
3. Fund Your Wallet
- Go to the “Receive” tab to generate a wallet address.
- Use this address to transfer crypto into your Web3 wallet (detailed steps in the next section).
4. Explore dApps and NFTs
With the built-in dApp browser, you can connect to platforms like OpenSea, Uniswap, or Aave. Click “Connect Wallet” on any dApp, and you’re ready.
Congratulations! You’re now ready to explore Web3.
Transferring Assets from Coinbase Primary to Web3 Wallet
Once your Web3 wallet is set up, you’ll want to transfer funds from your Coinbase primary wallet. Here’s how:
- Log into Your Coinbase Account
-
-
- Open the Coinbase app and ensure your account is funded.
-
- Select Assets to Transfer
-
-
- Navigate to your portfolio, choose the crypto asset you want to transfer (e.g., Ethereum), and select Send.
-
- Enter Your Web3 Wallet Address
-
-
- Copy the wallet address from your Coinbase Web3 wallet under the “Receive” tab, then paste it into the send field on the primary wallet app.
-
- Confirm Transaction
-
-
- Double-check the wallet address to avoid errors, as transactions are irreversible. Confirm, and your assets will be transferred within minutes.
-
When transferring, always account for gas fees, which vary depending on network congestion.
Security Considerations for Your Web3 Wallet
A Web3 wallet gives you unparalleled control—but with great power comes great responsibility. These security tips will help you protect your assets:
- Store Your Recovery Phrase Securely: Never share it online or store it digitally. Use a physical method, like writing it on paper and storing it safely.
- Enable Biometric Authentication: Use fingerprint or face recognition to add a layer of security to your wallet.
- Be Wary of Scams: Never share your wallet details with anyone. Scams targeting wallet users are familiar.
- Use Legitimate dApps: Only connect your wallet to trusted dApps to avoid exposing your funds to malicious actors.
Following these best practices ensures your assets remain secure.
Benefits of Using a Web3 Wallet
Switching to a Web3 wallet has clear advantages:
- True Ownership
Unlike a custodial wallet, you have complete control over your private keys and funds, aligning with the decentralized ethos of blockchain.
- Access to Decentralized Platforms
Engage with DeFi, NFT marketplaces, and dApps your primary Coinbase wallet doesn’t support.
- Cross-Chain Compatibility
A Web3 wallet supports multiple blockchain networks, giving you asset handling and interaction flexibility.
- Privacy
Web3 wallets prioritize user privacy by offering anonymous blockchain transactions.
For beginners interested in exploring the expansive world of Web3, a wallet is the ultimate power tool.
Troubleshooting and FAQs
Q1. Can I use the Coinbase Web3 wallet without a Coinbase account?
Yes! The Coinbase Web3 wallet functions independently and doesn’t require a Coinbase trading account.
Q2. What happens if I lose my recovery phrase?
Without your recovery phrase, you cannot access your wallet. This is why securely storing your recovery phrase is critical.
Q3. Are there fees for using the Coinbase Web3 wallet?
While the wallet is free, network fees (like Ethereum gas) apply for transactions.
Q4. Can I store NFTs in Coinbase Web3 wallet?
Absolutely! You can store, manage, and transfer NFTs within the wallet.
If you encounter other issues, visit Coinbase’s Help Center for assistance.
Start Your Web3 Journey Today
Decentralization is more than just a buzzword—it’s the foundation for the future of the internet. By switching to Coinbase’s Web3 wallet, you’re taking an essential step toward complete digital independence. You’re securing unparalleled control over your assets and gaining access to a world of innovation and opportunity.
Are you ready to unlock Web3’s full potential? Start by setting up your Coinbase Web3 wallet today, and explore the future of decentralized finance, NFTs, and more!


Leave a Reply